No hour of life is wasted that is spent in the saddle. ~Winston Churchill

Monday, April 2, 2012

Packing Essentials for Trail Riding

You and your trail riding buddies head down the trail. The sky is blue, the sun is shining, and you are anticipating a great ride. As the day wears on, seemingly out of nowhere you hear a clap of thunder, and quickly cover your eyes from the blinding light. You know that the Storm is closing in very quickly, however you are 5 long rugged miles from civilization. You have noticed your friend's horse has a slight limp and suddenly a whole myriad of thoughts cloud your mind..."Do we all have rain gear? Should we continue with the limping horse? Can we make it back without harming the horse or getting struck by lightning? What is the best option?"

Many experienced seasoned trail riders will tell you, that being prepared out on the trail is very important. Those who have spent hours in the saddle out in mother nature know all to well that circumstance doesn't always come in the form we plan. More often they come completely unplanned. There are many obstacles that can come about while away from camp. Weather can change in the blink of an eye, your horse's health can change at any given moment, you can become lost, and even you or one of your parties health can be compromised. None of us like to think about these incidents, but we should always come as the tried and true boyscout vows; prepared for anything. The following is a list of things I deem very important and helpful in packing in your saddle bags:

1. Water-it is very important to stay hydrated, and though we sometimes don't plan on being out long, we sometimes find we are there longer. Water can also be used to clean a wound. It's not very wise to clean a wound with dirty water.
2. Snacks-again comfort is the main reason, but also for unplanned long outings. Granola bars, nuts, cheese, chips or pretzels, boiled eggs, Uncrustables, jerky, and crackers are a few of my favorites.
3. Mace-I know this sounds a bit strange, but you just never know what you might come across when you are out. Wild animals and dogs are usually what have been encountered on my rides, however I have had people pop up beside me unbeknown to me without warning. We all know that you can never be too safe.
4. Sunscreen-it is very wise to grease up. Even while in the woods you can receive a nasty smack from Mr. Sun! If you have a horse with pink skin it can help him as well.
5. Insect repellent-Ticks and mosquitoes are prevalent out on the trail and make your ride miserable if you can not abate them.
6. Shoe strings and hair ties-these can be used for many reasons. Repair a faulty piece of tack, tie back hair, or even tie something to a saddle or make a temporary bandage adhesive.
7. Old fashioned handkerchief-there is a great reason why all cowboys wore them back in western times. They can be used for a washcloth, Kleenex, to cool your neck, bandage, and even to package something up.
8. Matches or a lighter-you never know when you might want or need to build a fire! I prefer a lighter or waterproof matches. A small piece of fire starter isn't necessary, but loved in a pinch.
9. Rain gear-be sure to purchase a good set. Nothing is more miserable than being in a sudden down pour and getting wet even after putting on your gear. The long trail blazers are nice, but having rain pants too is very helpful. I recommend a set made of rubber, not the usual trail blazer jackets you see most with. They look cool, but they get wet in a real down pour!
10. Safety pins-never know what might be fixed with just a pin.
11. Band aids and small first aid kit.
12. lip balm. Preferably with SPF.
13.Whistle-in case you need to call for help or ward off a wild animal.
14. Flash light.
15. Duct tape-it can fix a lot of things! Even tape on a loose horseshoe.

I am sure there are other things that might be fitting to take, but these are a few of the items I pack often in my saddlebags while out for the day on the trail. Plus one of my musts is always my handy dandy camera. You just never know what sites you will see that you might want to record for later memory!

Happy Trails!

He leadeth me beside the still waters.Psalms 23

Sunday, April 1, 2012

Camping Trip Menu

One of my favorite things to do is plan the menu for our camping trips! I love trying to come up with delicious, yet inexpensive, and convenient recipes that I can make in a jiffy so that I am not spending all of my time in the camper. There is nothing better then the aroma of your dinner already cooked and waiting for you after a long, enjoyable ride on the trail. We play hard (I know my husband along with his best friend Dave is literally laughing out loud on this one...hint we stop on the trail about as much as we ride!) and I am nothing but ready to sit and relax after returning to camp. The hardest thing I have to do is fight off all the other campers that can smell our cuisine drifting to their campsites! After much contemplation about variety, tastiness, time, as well as affordability this is what I have decided on for our suppers:
(I hope it's fitting for Keith...I haven't run it past him yet...HA!
Day 1


Crock pot Chicken Teriyaki

3 boneless, skinless chicken breast halves
16 ounces pineapple chunks in light syrup, partially drained
6 ounces teriyaki sauce

Place chicken breasts in crock pot. Add the pineapple and teriyaki sauce, cover. Cook on low for 6-8 hours, or high for 4-6 hours. Serve over rice.

Day 2
Like I said, I like quick and easy!


McCormick Crock pot BBQ Ribs
1 pkg. McCormick Seasoning Mix


4 lbs. bone-in pork ribs, cut into 2-rib sections*
1 cup ketchup
1/2 cup honey

DIRECTIONS
1. PLACE ribs in slow cooker. Mix Seasoning Mix, ketchup and honey until well blended. Pour over ribs. Cover.

2. COOK 8 hours on LOW or 4 hours on HIGH.

3. REMOVE ribs and place on serving platter; keep warm. Skim fat from sauce. Serve sauce over ribs.

*For country-style ribs, cut into 1-rib sections. Cook 8 hours on LOW.

For thicker sauce: Pour sauce mixture into medium saucepan. Skim fat. Bring to boil on high heat. Cook 10 minutes or until sauce is slightly thickened, stirring occasionally.

Slow Cooker Tip:
For best results, do not remove cover during cooking.
Serve with fried potatoes and onions straight from the iron skillet

Day 3

Dutch Oven Mexican Stew
1lb. hamburger
1/4C chopped onion
1 24oz. can V-8 juice
1 can corn
1pkg. taco season mix
1 small can sliced black olives
3/4C uncooked rice
1 15oz. can red kidney beans

Brown hamburger in dutch oven and drain grease. Add all ingredients and simmer 2 hrs. (try about 6 briquettes under the dutch oven and 4 on top.) Add taco chips when served.

Day 4
Left over day trail smorgasbord! :)

Saturday, March 31, 2012

How to Build the Best Campfire


My husband will appreciate this post, just for the mere reason that we are forever discussing how to create the best fire. And as campers we know that our camping experience isn't quite complete without it. There's nothing better at the end of the day then pulling up a chair and gazing into the wispy, blue, hot flames licking at the air, as you slowly turn that juicy, sizzling frank as it turns bubbly and brown.

To build a great fire you must first consider the fire triangle.

The triangle consists of fuel, oxygen, and heat. The best fuel for your fire is dry wood, but I have proven to my husband, with the right tools; building a fire with damp wood is even possible. It's also good to have a manufactured fire starter, some dryer lint, or some rolled up newspaper. We usually use some like these starter logs.
Next gather an armful of twigs, about the size of your pinky finger, and continue to gather larger twigs and sticks, until you have enough to make a decent pile.

This along with your fire starter is your tender/kindling. Now choose your source of ignition. I prefer lighters that have a long tip for lighting my fire, however matches, cigarette lighters, and even flint will start a well built fire structure.

Now that you have supplies needed here's how to build the best campfire.

1. Place your fire starter in a place designed for a fire, such as a fire pit, fire ring or a place where stones are positioned in a simple circle.
2. Now break the twigs into 5-7 inch pieces and arrange them teepee style on top of the fire starter. The teepee shape will encourage your fire to breath, giving it the oxygen it needs.
3. Continue to build up the teepee with the next sized sticks.


4. Add your logs starting with the smallest logs first and adding the larger ones once your fire is burning well.
5. I like to sprinkle a little lighter fluid on my built fire to speed up the ignition process a bit, but it isn't necessary.
6. If you aren't using lighter fluid, light the fire stater. If you have chosen to use fluid, light the part of the structure closest to you.
7.Sit back and enjoy your fire! And when you need to add more wood just be sure it's also propped up teepee style with the rest and your fire will continue to provide you enjoyment!


If you've ever had an interesting campfire story please share.

Thursday, March 29, 2012

There Must Be Horses in Heaven!


Proverbs 21:31
The horse is made ready for the day of battle, but victory rests with the LORD!

The Best Crockpot Recipes for Camping


Crockpot Chicken Catcciatori

2 boneless chicken breast
1 jar of spagetti sauce
1/2 large onion
1 green pepper
2 TBS minced garlic
8 oz. of fresh mushrooms sliced

Place the chicken breasts in the bottom of the crockpot. Cover with spagetti sauce. Dice the onion, slice the mushrooms, and chop the pepper. Place the garlic, peppers, onions, and mushrooms in the crockpot and mix with the sauce. Cook it on low for 6-8 hours or 2-4 hours on high. Experiment as if you cook it too long it will burn. Add parmisan cheese if wanted. Serve over spagetti or eat alone. A salad is a nice addition!


Stuffed Green Peppers

4 large Green peppers
1 lb of hamburger
1/2C of ketchup
1 can tomato sauce
Dash of worcheshire sauce
Salt and pepper to taste
1/2 large onion diced
1C of rice

Wash peppers and cup off the tops. Set aside. Brown hamburger and add diced onion. Drain. Mix in ketchup, tomato sauce, worcheshire sauce,rice, salt and pepper to the meat. Spoon into peppers and close tops. Place into crockpot. Cook in pot on low 6-8 hrs. or 2-4 on high. Add mozerella cheese if desired.

Sunday, March 25, 2012

It's Officially Riding Season!

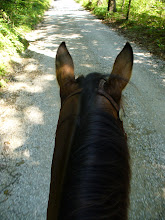
Ah....I sit down deep in my saddle, my horse and I head up the trail and join my husband and Skeeter. I begin to let my mind relax. My therapy begins the second I begin to take it all in...music to my ears...the rhythmic beat of hooves,the horses blow intermittenly, sweet songs of countless song birds, the occassional frog or insect, and leaves whispering as it reaches my senses. I inhale deep the earthy aroma of mother nature, sprinkled with a poutporri of wildflowers, last years autumn leaves slightly warmed; courtoesy of the sun, added to the very distinct smell of horse (that we horse people feel is the best smell ever!). I take in the eye candy...a turtle basking in the sun, the occassional snake slithers into the woods, lovely flora scattered throughout the forest floor, and many other sights painted by mother nature.

"How can anyone not be refreshed and rejuvienated by all of this?" I ponder. I know that Keith often wonders what is wrong when I am quiet, but if only he knew I was just taking in the pure enjoyment of life with him and the horses at this frozen moment in time. The only worrisome thought that crosses my mind during moments like this is, "How soon will we be able to do this again?" He often comments while on rides like these, "This is a day you never want to end, isn't it?" I told my friend Lori about this recent trip and she replied, "I am glad that you and Keith can do something together and enjoy it!" And you know she is right...maybe this is truely the biggest part of my enjoyment. I have someone to share these moments with, who also understands it's value to me.

The only thing that can make this ride any better is to get back to camp to a wonderful meal and build a campfire. To end my therapy session for the day I settle in to a comfortable chair and stare into a crackling fire and occasionally look over at God's wonderful creatures as I listen to soothing sound of their contiuous chewing of fresh, aromatic, sweet hay. The only thing that interupts this serenity is my husbands soft voice recounting the events of the day and of the ride to come.

This was one of the best, first rides of the season! Our ride lasted 4 days and 3 nights and we are already planning our next trip! Please come back and join me later. I will be sharing great camping recipes and tried and true tips to help you make your next camping trip the best!

Amazing Encounters


I guess it is true what Keith is always telling me..."When you are around horse people if you are willing to speak you will meet some interesting people." That is exactly what happened on this ride! My husband never knows a stranger and is never afraid to walk up and strike a conversation. Sometimes it makes me a little uneasy, but at times I am glad he took the extra step to make conversation with people we run across on our trail riding adventures. On this nice warm spring day (after the rains had settled) we saddled up and found ourselves at the Blue Hole (foot note: Laura Furnace Creek empties into Blue Hole, a deep spring that most of the year is a rich blue color. Located on the south end of the horseback riding area, it's a favorite spot for riders because of the peaceful scenery, cool water and proximity to many historic sites. You will notice the abundance of shiny blue rocks on the ground, which is slag, evidence of the Laura Iron Furnace, which ceased operations more than 100 years ago but left its mark on the landscape.) Because it is a hot spot for riders, there were several horsemen and horsewomen taking in the scenery here. A beautifully hand crafted shiny black buggy accompanied the rest of us. Two elegant, graceful coal black mixed breed horses stood as sentinels holding their positions in front of that magnificent piece of transportation. A quiet older gentleman rested in his seat. Keith began the conversation with assurance. "Now that is a very nice buggy." he complimented. They exchanged horse and buggy stories, which eventually led to Bob's history with horses. I was so intrigued by what this man had accomplished and experienced I had little to do but listen. His stories began about how he broke horses to pull. He demonstrated how his team were familiar with "gee" and "haw". This is how buggy and carriage drivers tell their teams to move left or right. But the most interesting parts of his conversation fell on how he belonged to a Buffalo Bill Wild West show and that he would drive 6 leopard Appaloosas at full speed while pulling a stage coach and come to a screeching, sliding stop!
He also discussed a friend he knew that was a trick rider whom in years gone by owned a palomino horse that Roy Rogers borrowed to ride in a parade, which was the same parade that Roy proposed to Dale Evans!
He ended his conversation explaining The Great Circus Parade that he was a part of many times and how extravagant and expensive it was to put on, and that sadly because of cost is no longer being held.

I had never heard of this and was very intrigued...so once I returned home I began researching this Great Circus Parade and what is was like. I am sad to say that I have never witnessed this wonderfully extravagant event, with its beautifully preserved wagons and carriages. I have never seen anything like this and long for another day for the event, so that I too might be one of the lucky ones. Not only did I find great information and pictures about the parade, but I also found really detailed information about the Wild West Shows that he spoke of.

So today was a lesson learned...never pass up the opportunity to meet people...you just might have a learning experience and go away with a story worth retelling!

I am also going to include the websites where I found this information. Feel free to browse them for yourself! You can find these links under "Horse Stuff" on the right.